Bobber and Jig Technique for Oregon Salmon
There’s nothing quite like the thrill of salmon fishing in Oregon, but let’s be honest, it can also be incredibly frustrating when the fish just aren't biting your usual offerings. Many anglers find themselves battling snags or struggling to present their bait naturally in tricky currents. This comprehensive guide is here to introduce you to the bobber and jig technique, a highly effective and often overlooked method that can dramatically increase your chances of hooking into that prized Oregon salmon.
Understanding the Bobber and Jig Technique
When it comes to salmon fishing, many anglers immediately think of trolling, drift fishing, or even plunking. While these methods certainly have their place, the bobber and jig technique offers a level of finesse and versatility that can often outperform traditional approaches, especially in specific conditions. It's a method that allows for a truly natural presentation, letting your offering drift enticingly into a salmon's strike zone without the constant drag or bottom contact that can alarm wary fish.
Why Bobber and Jig for Salmon?
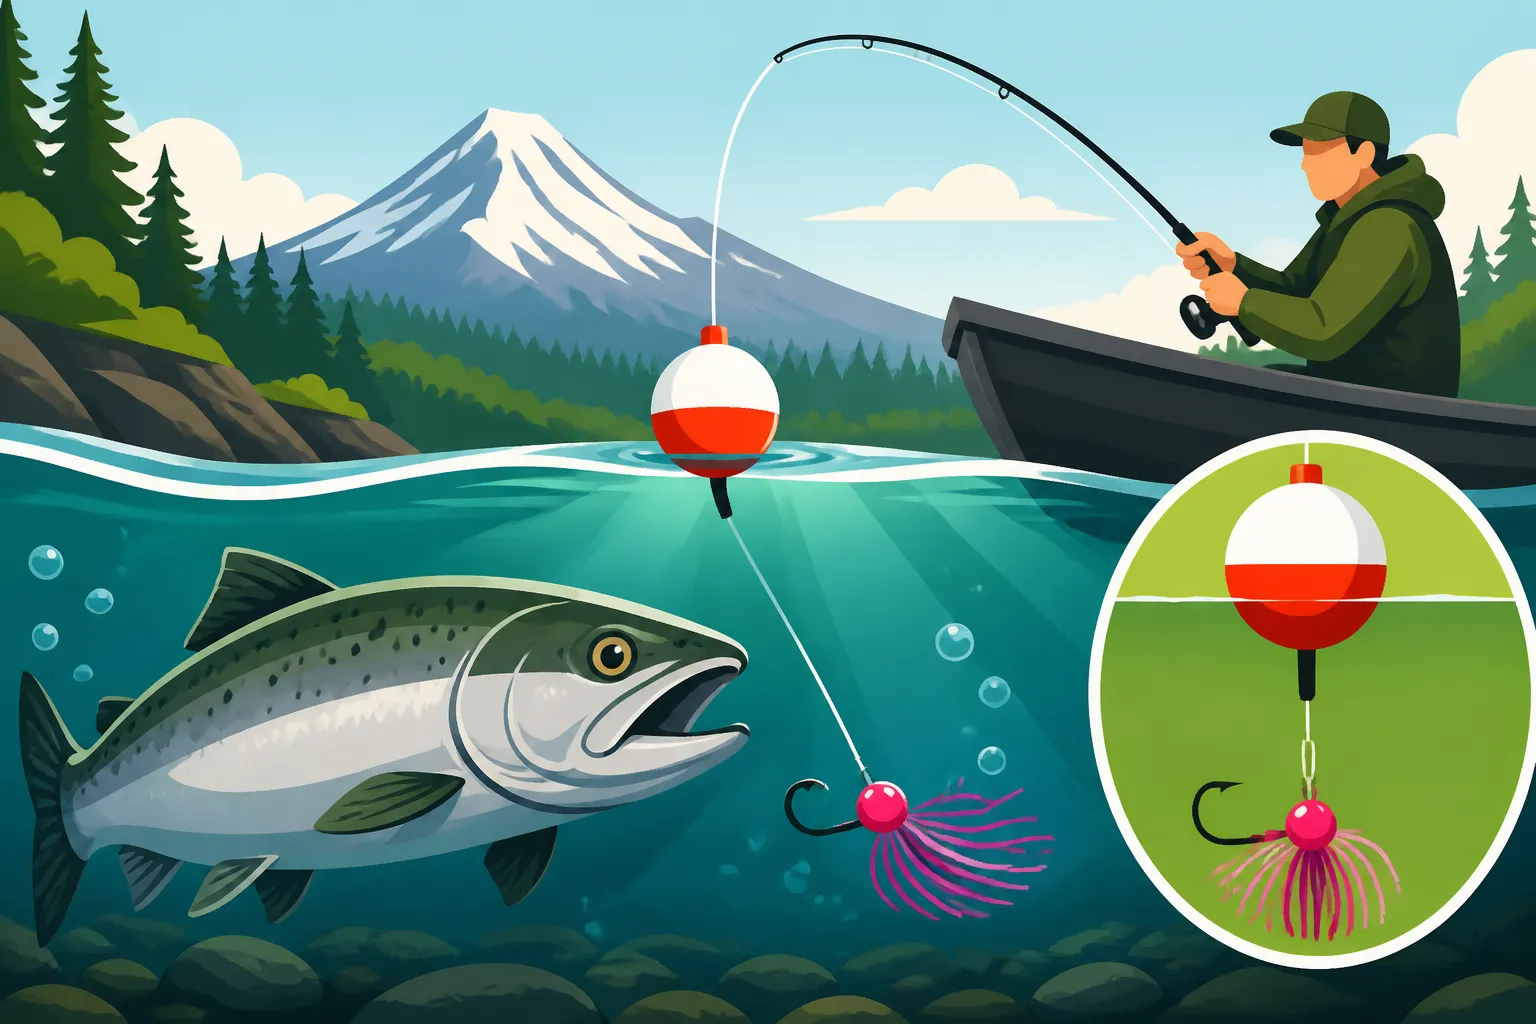
The primary advantage of using a bobber and jig for salmon is the ability to present your bait or lure at a precise depth, suspending it perfectly in the water column. Salmon, particularly when they're staging in deeper pools or traveling through distinct current lanes, often hold at very specific depths. Trying to reach these fish with drift gear can lead to endless snags and lost tackle, while trolling might not be feasible or effective in tighter river sections.
With a bobber, you're essentially creating a suspension system that keeps your jig right where the fish are, hovering just above obstacles without constantly dragging the bottom. This reduces snags significantly, saving you money and valuable fishing time. Furthermore, the natural action of a jig suspended under a bobber in moving water can mimic an injured baitfish or a drifting insect, which is incredibly appealing to salmon. It's less aggressive than a trolled plug and more active than a stationary plunking setup, offering a perfect middle ground that often triggers a strike when other methods fail. The visual cue of a bobber disappearing also provides an unmistakable signal of a bite, making it exciting and engaging for anglers of all skill levels.
How It Differs from Other Methods
To truly appreciate the bobber and jig, it helps to understand how it stands apart from the common salmon fishing techniques you might already be familiar with.
- Drift Fishing: This involves bouncing a weight along the bottom with a bait or lure trailing behind. While effective, it's prone to snags in rocky or log-filled areas. The bobber and jig, in contrast, suspends your offering, allowing it to float over snags while maintaining depth. You're controlling the vertical position much more directly.
- Plunking: This is a static method where a heavy weight anchors your bait in one spot, typically on the bottom in a fast current, waiting for salmon to swim into it. The bobber and jig is an active, mobile technique. You're casting and drifting, covering water and seeking out fish, rather than waiting for them to come to you.
- Trolling: This method uses a boat to drag lures or baits through the water, covering large areas. While great for open water, trolling is often impractical or prohibited in smaller rivers or tight holding areas. The bobber and jig excels in these tighter, more defined river environments, offering a more stealthy and precise presentation from shore or a stationary boat.
The key difference is control. The bobber and jig gives you incredible control over your presentation's depth and drift speed, making it a surgeon's tool compared to the broad strokes of other techniques.
Ideal Scenarios for This Technique
While highly versatile, the bobber and jig technique truly shines in specific fishing scenarios across Oregon's diverse waterways.
- Medium to Slow Current: This method works best where the current is strong enough to give your jig a natural swimming action but not so fast that it sweeps your bobber downstream uncontrollably or makes it impossible to detect subtle bites. Think of those beautiful, swirling eddies and current seams just below a riffle or a deeper pool.
- Holding Water: Salmon love to rest in specific areas as they migrate upstream. These "holding lies" often include deep pools, behind large boulders, alongside submerged logs, or in distinct current seams where faster water meets slower water. The bobber and jig allows you to repeatedly drift your offering through these exact spots with pinpoint accuracy.
- Clearer Water Conditions: When the water is clear, salmon can be more wary. The natural, subtle presentation of a bobber and jig is less intrusive than a heavy sinker dragging the bottom or a boat trolling overhead. The silent drift can tempt even the most skittish fish.
- Bank Fishing Accessibility: For anglers without a boat, the bobber and jig is an absolute game-changer. It allows you to target fish in deeper channels and across complex currents from shore, reaching spots that might otherwise be inaccessible.
- Targeting Fall Chinook and Winter Steelhead: While this guide focuses on salmon, the technique is incredibly effective for steelhead too, especially winter steelhead in coastal rivers like the Wilson, Nestucca, or Siletz. For salmon, particularly fall Chinook salmon, when they're stacking up in larger pools or moving through distinct travel lanes in rivers like the Columbia River, this method can be deadly.
When you find yourself fishing a spot with defined features and moderate current, where you suspect salmon are holding at a specific depth, reaching for your bobber and jig setup is often your best bet for success.
Essential Gear for Bobber and Jigging Salmon
Having the right equipment is paramount for success with the bobber and jig technique. While it might seem straightforward, each component plays a crucial role in presentation, bite detection, and ultimately, landing that powerful Oregon salmon. Skimping on quality here can lead to frustration and missed opportunities.
Rod and Reel Setup
Your rod and reel are the foundation of your bobber and jig setup, working in concert to provide the sensitivity, casting ability, and power needed for salmon.
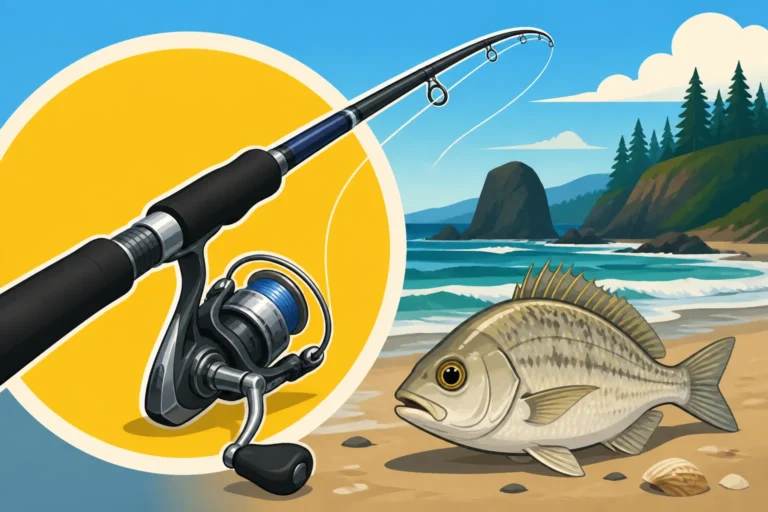
- The Rod: For salmon, you'll generally want a rod that's around 9 to 10.5 feet long. This extra length is invaluable for several reasons: it helps with casting distance, especially when you need to reach across currents; it aids in mending your line to achieve a drag-free drift; and it provides better line control to steer a hooked fish away from snags. Look for a rod with a moderate-fast action, meaning it bends well into the middle of the blank but still has a responsive tip. This action offers excellent shock absorption for fighting powerful salmon and helps prevent hooks from tearing out. The power should be medium-heavy, giving you the backbone to handle fish that can easily weigh 15-30 pounds or more. Brands like Lamiglas and Shimano offer excellent options for these types of rods, often designed specifically for salmon and steelhead.
- The Reel: Both spinning and baitcasting reels can work, but spinning reels are generally preferred for their ease of use, especially when casting lighter jigs and floats, and their ability to handle sudden runs. Choose a reel in the 3000-4000 series size, ensuring it has a smooth, reliable drag system. A salmon's initial run can be explosive, and a sticky drag will lead to snapped lines and heartbreak. Line capacity is also important; you'll want enough to handle long runs in strong currents.
- The Line: Your mainline is typically 30-50 pound braided line. Braid offers superior sensitivity due to its lack of stretch, meaning you'll feel even the most subtle taps on your jig. It also has a smaller diameter for its strength, allowing for longer casts. A high-visibility color like yellow or green can be beneficial, as it helps you track your bobber and detect subtle drifts. For your leader, 15-25 pound fluorocarbon or monofilament is ideal. Fluorocarbon is nearly invisible underwater and has excellent abrasion resistance, which is crucial when fishing around rocks and logs. The choice of leader strength depends on water clarity and the size of salmon you're targeting; lighter for clear water, heavier for murky. If you're looking for a solid setup, check out guides on Best rod and reel setup for Columbia River salmon for more specific recommendations.
Selecting the Right Bobber (Float)
The bobber, or float, is more than just an indicator; it’s a critical component that dictates your presentation. Choosing the right one is about balancing visibility, buoyancy, and functionality.
- Types: You'll primarily encounter two types: fixed floats and sliding floats. Fixed floats are attached at both the top and bottom of the line and are excellent for shallower water (typically less than your rod length) where precise depth control is paramount. Sliding floats, on the other hand, are attached only at the bottom, with a bobber stop above them. This allows the float to slide freely up and down your mainline, making it ideal for deep water where fixed floats would make casting impossible. For salmon, sliding floats are often preferred due to the depths they frequent.
- Size and Buoyancy: Your bobber's size and buoyancy must be perfectly matched to the weight of your jig and any additional split shot. The goal is for the bobber to float upright, with enough of its brightly colored tip exposed for visibility, but not so much that it's difficult for a fish to pull it under. A bobber that's too large for your jig won't dip easily, making subtle bites hard to detect. One that's too small will sink too quickly or struggle to carry your jig to the correct depth. Experimentation is key here.
- Color: Bright colors like fluorescent orange, chartreuse, or even a mix of colors are popular choices. These colors stand out against the water, making it easy to see your bobber from a distance, even in varying light conditions. The contrast helps tremendously in discerning between a natural drift and a subtle take.
Choosing the Perfect Jig
The jig is your primary attractant, and its selection is as much an art as it is a science. Oregon salmon can be picky, so having a range of jigs on hand is always a good idea. For more general advice on what lures work well, consult resources like Best lures for Oregon Salmon Fishing.
- Weight: This is crucial for matching the current and depth. Common weights for salmon jigs range from 1/4 ounce to 1 ounce. In slower, shallower water, a lighter jig (1/4 – 3/8 oz) might be perfect. For deeper holes or faster currents, you'll need heavier options (1/2 – 1 oz) to get down quickly and stay in the strike zone. If you find your jig isn't getting down, a bit of added split shot can help.
- Color: Salmon are attracted to a variety of colors, and what works best can change daily. Popular choices include chartreuse, pink, black, purple, orange, and combinations thereof. For bright, clear days, natural colors might be preferred, while in murky water or low light, brighter, more contrasting colors can be more effective. Having a selection from a brand like Steelhead Co. or a similar quality jig manufacturer that are available on Amazon can save you a lot of guesswork.
- Material/Style: Most salmon jigs are made with marabou, bucktail, or rabbit fur. Marabou offers a pulsating, breathing action in the water that is incredibly lifelike and alluring. Bucktail is more durable and provides a slightly different profile. Rabbit fur jigs also have a fantastic action. The goal is to choose a material that creates a natural, enticing profile as it drifts.
- Hook Size: Jigs typically come with a single, sharp hook. For salmon, a hook size in the 1/0 to 3/0 range is common, ensuring a good hook-up ratio and the strength to handle powerful fish. Always check your hooks for sharpness before heading out; a dull hook is a missed fish.
Terminal Tackle and Accessories
Don't overlook the small but mighty components of your setup. They can make all the difference.
- Swivels: High-quality barrel swivels (size 7-10) are essential to prevent line twist, especially when adding bait to your jig. A good swivel can be purchased in bulk on Amazon.
- Beads: Beads protect your knots and provide smooth movement for sliding floats. A small plastic bead placed between your bobber stop and the top of your sliding bobber will cushion the impact of the bobber stop.
- Bobber Stops: These tiny pieces of string or rubber are tied or slid onto your mainline to set the depth of your sliding bobber. They need to be small enough to pass easily through your rod guides when casting, yet strong enough to hold your bobber in place.
- Split Shot: Small split shot weights are invaluable for fine-tuning the sink rate of your jig or balancing your bobber.
- Bait Additions: While jigs are effective on their own, adding a small piece of bait can significantly increase your success. Cured prawns, a piece of salmon roe, or even a dab of scent can give your jig that extra edge. For tips on scents, check out articles like Best scent for salmon eggs bait. Adding a scent from Pro-Cure or Pautzke is a common practice for Oregon anglers.
- Tools: Don't forget essentials like needle-nose pliers for unhooking fish, line clippers, and a sturdy landing net.
Mastering the Bobber and Jig Technique: Step-by-Step
Once you have your gear sorted, it's time to put it all together and learn the nuances of presenting your bobber and jig effectively. This technique is all about precision and feel, so pay close attention to the details.
Rigging Your Setup
A properly rigged setup is the cornerstone of effective bobber and jig fishing. Taking the time to tie strong knots and assemble your components correctly will prevent break-offs and ensure a natural presentation.
- Mainline to Bobber Stop: First, thread your main braided line through your rod guides. Then, take a bobber stop and slide it onto your mainline. This will be the upper limit for your sliding bobber, determining your fishing depth. Ensure it's snug enough to hold but can be adjusted later.
- Add a Bead: Slide a small plastic bead (usually 4-6mm) onto your mainline, directly below the bobber stop. This bead protects the knot of your bobber stop from the constant tapping of your sliding float and allows for smoother movement.
- Attach the Sliding Bobber: Next, thread your mainline through the eye of your sliding bobber. The bobber will now sit freely between the bead and your leader knot.
- Tie on a Swivel: At the very end of your mainline, tie on a high-quality barrel swivel (size 7-10) using a strong knot like a Palomar or improved clinch. This swivel helps prevent line twist from the jig's action and acts as a connection point for your leader.
- Leader to Swivel: Take a length of fluorocarbon or monofilament leader material (typically 2-4 feet long, depending on water clarity and depth) and tie one end to the other side of your swivel.
- Attach the Jig: Finally, tie your chosen jig to the tag end of your leader. A loop knot (like a Rapala knot) is often preferred here, as it allows the jig to swing freely, maximizing its action in the water.
- Adjust Depth: Before casting, measure the depth of the water you intend to fish. Adjust your bobber stop so that your jig will drift approximately 1-2 feet off the bottom, or at the depth where you've observed salmon holding. This is critical for getting your presentation into the strike zone. You can fine-tune this as you fish.
Rigging Components and Their Purpose
| Component | Typical Material/Size | Purpose |
|---|---|---|
| Mainline | Braided (30-50 lb) | Casting, sensitivity, strength |
| Bobber Stop | String or Rubber | Sets and holds fishing depth for sliding bobbers |
| Bead | Plastic (4-6mm) | Protects bobber stop knot, allows smooth bobber movement |
| Sliding Bobber | Foam/Balsa (1/2 oz – 1.5 oz) | Floats jig at desired depth, visually indicates bites |
| Barrel Swivel | Metal (Size 7-10) | Connects mainline to leader, prevents line twist |
| Leader | Fluorocarbon/Mono (15-25 lb, 2-4ft) | Stealth, abrasion resistance, connects swivel to jig |
| Jig | Marabou/Bucktail (1/4 oz – 1 oz) | Primary attractant, provides action and color |
| Split Shot | Lead/Steel (optional) | Fine-tunes jig sink rate, balances bobber buoyancy |
Casting and Presentation
Once rigged, the next challenge is getting your jig into the water naturally and maintaining a perfect drift.
- Casting for Accuracy: Accuracy is key, especially when targeting specific holding lies. Use a smooth, deliberate overhead or sidearm cast, aiming to land your bobber just upstream of where you expect the fish to be. Minimize splash, as a loud entry can spook wary salmon. With a longer rod, you'll find you can reach out to those distant current seams or the far side of a deep pool.
- Reading the Water: This is perhaps the most crucial skill. Look for areas where current speed changes: seams where fast water meets slow, eddies behind rocks or logs, and distinct color changes in the water. These are prime spots where salmon will rest, out of the main current but still in a travel lane. You're trying to identify the "conveyor belt" of current that will carry your jig naturally. In places like the Columbia River, knowing how to read the complex currents is vital for successful fall Chinook fishing.
- Achieving a Natural Drift: The goal is a "drag-free drift." Your bobber should move downstream at the exact same speed as the current, without being pulled faster or held back slower by your line. This looks completely natural to a salmon. To achieve this, you'll need to "mend" your line. As your bobber drifts, a belly will form in your line due to current differences. Lift your rod tip and flip the line upstream (mending) to straighten it out and eliminate drag. This makes sure your jig isn't swinging unnaturally. Think of your float as a bowling ball, and your jig as a feather, both moving at the same pace.
- Depth Adjustment: Continuously adjust your bobber stop to find the precise depth where salmon are holding. Start a foot or two off the bottom, and if you're not getting bites, move it up or down in small increments. Salmon often hug the bottom, but they might also suspend higher in the water column depending on conditions. Don't be afraid to experiment throughout your fishing session.
The Retrieve and Hookset
The moments after your cast, leading up to a potential strike, are filled with anticipation. Detecting a bite and setting the hook properly are essential for converting interest into a landed fish.
- Subtle Retrieves vs. Dead Drift: Most of the time, a perfectly dead drift is what you're aiming for. However, sometimes a very subtle retrieve, a slight twitch of the rod tip, or a momentary pause can impart just enough action to your jig to trigger a strike. This is especially true if you suspect a fish is following but not committing. For learning similar techniques, check out How to bobber fish for steelhead, as the principles often translate directly.
- Detecting Strikes: This is where the bobber truly earns its keep. A salmon strike isn't always a dramatic pull-under. It can be a sudden stop, a slight hesitation in the drift, a subtle dip, or a quick sideways movement. Watch your bobber intensely. Any deviation from its natural drift should be treated as a bite. In clearer water, you might even see the flash of a salmon near your jig before the bobber moves.
- Setting the Hook: When you see a bite, react quickly but calmly. Don't yank. Instead, perform a firm, sweeping hookset by lifting your rod tip upwards and slightly to the side, maintaining tension. The braided mainline's lack of stretch will ensure a solid connection. Be prepared; a salmon on the line is a powerful creature!
- Fighting the Fish: Once hooked, keep steady pressure on the fish. Use your rod to "lead" the fish, steering it away from snags, logs, or other obstacles. Let your drag do its job, especially on those initial powerful runs. Don't try to horse a big salmon in; patience and a properly set drag will win the fight. Keep your rod tip high to maintain control and leverage.
Advanced Tips and Local Insights for Oregon Salmon
While the core principles of bobber and jigging remain consistent, adapting your approach to specific Oregon rivers and conditions is what separates a good angler from a truly successful one. Oregon's diverse waterways present unique challenges and opportunities.
Adapting to Different Oregon Rivers
Oregon is blessed with an incredible variety of salmon-bearing rivers. Each has its own character, current speed, and fish behavior, requiring slight adjustments to your bobber and jig strategy. For a broader overview of where to fish, take a look at our Oregon Fishing Spots by Region and Best Rivers to Fish in Oregon guides.
- Columbia River: This mighty river is known for its size and powerful currents, especially when targeting fall Chinook salmon. Here, you'll often need heavier jigs (up to 1 oz) to get down to the fish holding in deeper channels and submerged structures. Long casts are often necessary, and precise line mending is crucial to maintain a good drift in varying current speeds. Many anglers focus on specific seams and eddies, often from a boat but also from accessible bank locations. If you're specifically targeting these powerful fish, our guide on How to Fish for Fall Chinook on the Columbia provides more detailed strategies.
- Oregon Coastal Rivers (e.g., Nehalem, Wilson, Nestucca): These rivers tend to be smaller, faster, and often clearer than the Columbia. While famous for winter steelhead, they also host significant salmon runs. In these environments, you might use slightly lighter jigs (1/4 to 3/8 oz) and leaders (15-20 lb) for a more stealthy presentation. Accurate, shorter casts into smaller pockets and behind river features are key. Clearer water demands less intrusive presentations and often more natural jig colors.
- Willamette River: The Willamette presents a unique challenge, with its urban sections and slower, deeper stretches. Spring Chinook salmon are a primary target here. The bobber and jig can be incredibly effective in the deeper holes and along channel edges where fish hold. Water clarity can vary greatly, influencing your jig color and leader choices. Understanding the subtle currents and contours of the riverbed is vital. Our guide How to Fish for Spring Chinook on the Willamette offers specific advice for this river.
Remember, local knowledge is invaluable. Talk to local tackle shop owners or successful anglers; they often have the most up-to-date information on what's working where.
Timing is Everything
Beyond the location, the time of year, water levels, and even the tides can significantly impact your bobber and jig success. Our overall Oregon Fishing Season Dates and Limits guide is a great starting point for seasonal planning.
- Tides in Tidewater Sections: For rivers that are influenced by the ocean tides, like the lower Columbia or coastal estuaries, understanding the tide cycle is critical. Salmon often push into these areas on an incoming tide and will move and bite differently during high slack or outgoing tides. The "fishy" times are often the first few hours of the incoming tide and the last hour of the outgoing.
- Water Levels and Clarity: High, muddy water after heavy rains can make fishing challenging, as fish scatter and visibility is poor. Low, clear water can make fish wary. The ideal condition is often a stable, slightly elevated water level with good clarity, often referred to as "fishing green" water. Adjust your jig colors accordingly: bright and contrasting in murky water, more natural in clear.
- Peak Migration Times: Matching your trip to the peak migration of the salmon run you're targeting is paramount. For example, spring Chinook runs are different from fall Chinook, and understanding these timings is crucial. Check out Spring Chinook Season Timing in Oregon for more specific information on that particular run. The Oregon Department of Fish and Wildlife (ODFW) website is a fantastic resource for real-time fish counts and run forecasts.
Common Mistakes to Avoid
Even experienced anglers can fall into traps when using the bobber and jig. Being aware of these common pitfalls can save you a lot of frustration.
- Incorrect Weighting: Using a bobber that's too buoyant for your jig, or a jig that's too light for the current, will result in poor presentation and missed bites. Your bobber should sit relatively low in the water, with just its indicator tip showing.
- Not Adjusting Depth: Salmon move! What was the perfect depth an hour ago might not be now. Don't be afraid to adjust your bobber stop frequently, trying different depths until you find where the fish are holding.
- Ignoring Subtle Bites: As mentioned, salmon bites aren't always aggressive. Many anglers miss fish by not reacting to small dips, pauses, or sideways movements of their bobber. Assume every anomaly is a bite.
- Fishing Dead Water: Don't waste time casting into areas with no current or obvious structure. Salmon will typically hold where there's current to bring them food or cover to rest.
- Neglecting Regulations: Oregon fishing regulations change frequently and vary by river and species. Always check the current ODFW synopsis or website before you go. What's legal on one river might not be on another. This includes specific bait restrictions or gear requirements. A quick glance at Oregon Fishing Regulations Explained can save you a fine.
By being mindful of these factors and making constant adjustments, you'll significantly increase your odds of success.
The Thrill of the Take: Landing and Releasing Your Salmon
The moment that bobber disappears or dips decisively is a rush like no other. But the job isn't done until the fish is either safely in the net or carefully released. Responsible angling practices are just as important as the catching itself.
Handling Your Catch Responsibly
Once you've set the hook and fought your salmon to the bank or boat, proper handling is key, whether you plan to keep it or release it.
- The Net is Your Friend: Always have a good-quality, knotless landing net ready. Using a net minimizes stress on the fish and makes it much safer for both the angler and the fish. Trying to beach a large salmon can injure the fish and put excessive strain on your leader, often resulting in a lost fish. A rubberized net is ideal as it's gentle on fish scales and slime, and hooks don't tangle as easily.
- Unhooking Techniques: If you intend to release the fish, try to keep it in the water as much as possible. Use needle-nose pliers or a hook-remover to quickly and carefully remove the hook. If the hook is deeply set, it's often better to cut the line as close to the hook as possible rather than causing further damage by trying to retrieve it. Minimize air exposure; a salmon out of water is like you holding your breath.
- Minimizing Stress: Avoid dragging the fish over rocks or rough surfaces. Handle it gently, supporting its body. If taking a photo, do it quickly with wet hands, keeping the fish low to the water, and return it to the water immediately. Give the fish time to revive in the current, holding it upright until it swims away under its own power.
Knowing When to Keep and When to Release
Understanding Oregon's regulations regarding retention is crucial. This not only ensures you stay within the law but also contributes to healthy fish populations.
- Hatchery vs. Wild Fish: Many Oregon rivers have regulations that distinguish between hatchery and wild salmon. Hatchery fish are typically marked with a clipped adipose fin, while wild fish retain theirs. Often, wild salmon are required to be released unharmed. Knowing how to identify a fin clip is paramount. Our article on How to tell a wild steelhead from a hatchery steelhead provides excellent details on this, and the same principles apply to salmon. Always be prepared to release a wild fish if the regulations demand it.
- Bag Limits and Size Restrictions: The Oregon Department of Fish and Wildlife sets specific daily bag limits and sometimes size restrictions for different salmon species in various rivers. These limits are in place to manage fish populations sustainably. You must adhere to these limits. Check the current regulations for the specific river you are fishing, as these can change annually or even in-season due to emergency closures. For a general overview, see Oregon Daily Bag Limits Explained.
- Making the Choice: If you've caught a legal-to-retain, healthy hatchery fish, and you wish to keep it, dispatch it quickly and humanely. Bleeding the fish immediately after catching can improve meat quality significantly. If you've caught a wild fish, or a hatchery fish beyond your daily limit, release it as gently and quickly as possible.
Documentation and Enjoyment
Beyond the catch, there's the broader experience of fishing in Oregon.
- Catch Record Cards: For certain species like salmon and steelhead, Oregon requires anglers to use a Catch Record Card to record their harvest. This data is vital for fisheries management. Make sure you understand Oregon Catch Record Card Requirements and fill it out accurately as soon as you retain a fish. Not doing so can result in penalties.
- Celebrating the Experience: Remember to take a moment to appreciate the beauty of Oregon's outdoors, the challenge of the chase, and the satisfaction of a successful outing. Whether you're bringing home a delicious salmon for dinner or releasing a powerful wild fish to fight another day, the bobber and jig technique offers a truly engaging and often very rewarding way to connect with Oregon's incredible fisheries.
Disclaimer
Fishing conditions and regulations in Oregon can change frequently. Always consult the official Oregon Department of Fish and Wildlife (ODFW) website or their current fishing synopsis before heading out on the water to ensure you have the most up-to-date information on licenses, seasons, bag limits, and specific river rules. This guide is for informational purposes only and does not replace official regulations.