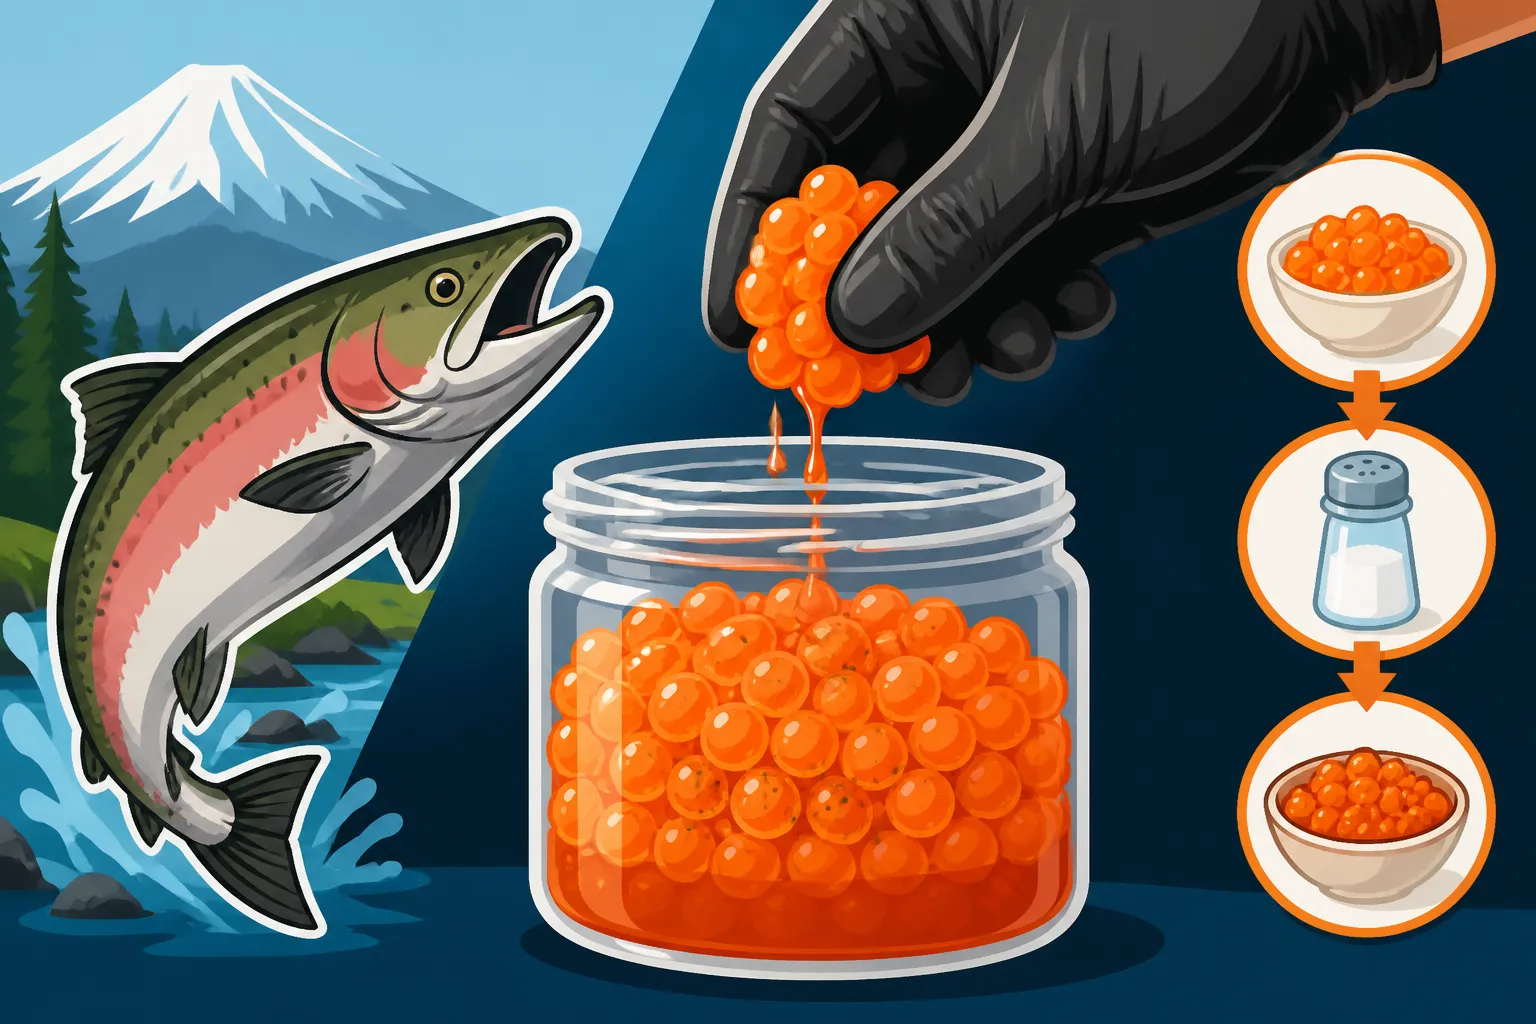
How to cure salmon eggs for bait
There's nothing quite like the thrill of reeling in a beautiful salmon or steelhead, but what if you could extend that experience even further by using bait derived directly from your catch? Many anglers find themselves frustrated with the cost and inconsistent quality of store-bought salmon eggs, or they simply want to add a personal touch to their fishing game. This comprehensive guide is here to walk you through the art and science of curing your own salmon eggs for bait, ensuring you have a potent, fresh, and cost-effective option for your next Oregon fishing adventure.
Why Cure Your Own Salmon Eggs? The Advantages
Let's be honest, there's a certain satisfaction that comes from being self-sufficient in your angling pursuits. Curing your own salmon eggs isn't just a fun project; it offers some tangible benefits that can truly elevate your fishing success, especially when you're targeting those elusive salmon and steelhead in Oregon's renowned rivers and coastal waters.
Freshness and Effectiveness
When you cure your own eggs, you're starting with the freshest possible product. Unlike commercial eggs that have often traveled long distances and sat on shelves, your eggs come straight from a recently caught fish. This freshness translates directly into effectiveness. Fish are incredibly sensitive to scent and texture. Freshly cured eggs retain more of their natural oils and juices, creating a potent scent trail that can entice even the most finicky fish. Think about it: a wild fish is instinctively drawn to the natural smell of eggs from its own species, and there's no substitute for that authentic appeal.
Store-bought eggs, while convenient, sometimes lack that vital "zing." They might be overly dry, too mushy, or have a chemical undertone from preservatives that fish can detect and shy away from. By taking control of the curing process, you ensure your bait smells, feels, and looks as natural and appealing as possible to a hungry salmon or steelhead. It's about giving yourself the best possible edge out on the water.
Cost Savings and Control
Let's face it, fishing can be an expensive hobby. A good jar of commercially cured salmon eggs can set you back a pretty penny, and if you're fishing regularly or going through a lot of bait, those costs add up quickly. When you harvest eggs from a fish you've already caught, you're essentially getting your bait for free, or at least at a significantly reduced cost compared to purchasing it retail. This can make a big difference, especially for families or anglers on a budget.
Beyond just the financial savings, curing your own eggs gives you complete control over the final product. You can customize the firmness, the color, the scent, and even the size of your egg clusters. Do you prefer a firmer egg that stays on the hook longer in fast currents? Or a softer, more delicate egg for still water? You decide. Want to add a specific amino acid scent that you've found works wonders in your local river? You can. This level of customization allows you to fine-tune your bait to specific fishing conditions, water clarity, and even the species you're targeting. You become the bait master, tailoring your offerings to perfection.
The Satisfaction of DIY
There's an undeniable sense of pride and accomplishment that comes with catching a fish on bait you prepared yourself. It connects you more deeply to the entire fishing process, from harvest to presentation. It's a skill that's been passed down through generations of anglers, a tradition that many find incredibly rewarding. When you're out on the Columbia River Fishing Guide or a coastal stream, and you hook into a magnificent Chinook using your hand-cured eggs, the experience is just that much sweeter.
It’s also a great way to learn more about the fish you’re targeting. Understanding the biology of the eggs and how different curing agents react with them can deepen your overall knowledge of fish behavior and what makes an irresistible offering. Plus, it's a fantastic way to spend some time during the off-season, preparing for the next big run. It’s an extension of the fishing experience, one that many find just as engaging as the act of fishing itself.
Gathering and Preparing Your Salmon Eggs
The quality of your cured eggs starts long before any curing agents come into play. It all begins with how you source and handle the eggs immediately after you've landed that beautiful fish. Think of it as the foundation of your future bait success. Skimp on these initial steps, and even the best curing process might not yield the results you're hoping for.
Sourcing Quality Eggs
The best eggs for curing come from salmon or steelhead that are fresh, ideally caught by you. Ripe, mature skeins are what you're after. When you land a fish, especially if you plan to keep it for its eggs, swift and proper handling is key. The first thing is to bleed the fish immediately. This helps preserve the quality of the flesh and, crucially, keeps blood from tainting the egg skeins. A quick cut to the gills and letting it bleed out in cool water or a cooler is ideal.
Once bled, keep the fish cool. Ice is your best friend here. The goal is to get the fish's internal temperature down as quickly as possible to prevent any degradation of the eggs. When you're ready to process the fish, be gentle. Avoid excessive pressure on the belly cavity where the eggs reside. You're looking for vibrant, intact skeins, not bruised or burst eggs. This meticulous approach ensures you start with the highest quality raw material, which is absolutely essential for a successful cure. You can find more details on species and handling in our Oregon Salmon Species Guide.
The Importance of a Clean Skein
A "skein" is the membrane that holds the individual eggs together within the fish. For curing, you want to remove this skein as cleanly as possible. When you open the fish, you'll typically find two skeins. Carefully extract them, making sure not to puncture or tear the delicate membrane more than necessary. The goal is to keep the eggs as intact as possible within their natural casing.
Once removed, gently rinse the skeins under cold, running water. This helps remove any excess blood, slime, or bits of entrails. Be incredibly gentle during this step; you don't want to burst the eggs or separate them from the skein prematurely. Think of it like washing a delicate piece of fabric. The cleaner the skein and eggs are at this stage, the better the cure will penetrate and preserve them, and the more appealing they'll be to fish.
Cleaning and Draining the Eggs
After the initial gentle rinse, the next crucial step is thorough draining. Excess moisture is the enemy of a good cure, as it can dilute your curing agents and lead to a mushy, less effective bait. Lay your cleaned skeins out on several layers of paper towels or clean newspaper. You can also use a clean dishtowel. Gently pat the skeins dry, allowing the paper to absorb as much surface moisture as possible. You might need to change the paper towels a few times until they are relatively dry to the touch.
Some anglers even place the skeins in a strainer or colander in the refrigerator for an hour or two, allowing gravity to pull away any remaining moisture. This pre-drying step is vital because it creates the ideal surface for your curing agents to adhere to and begin their work. If the eggs are too wet, the cure won't stick properly, and you'll end up with a subpar product. It's a small detail, but one that makes a huge difference in the longevity and effectiveness of your bait.
Popular Curing Methods for Salmon Eggs
Now for the fun part: actually curing those beautiful eggs! There are several tried-and-true methods, each with its own advantages. Whether you're a purist who likes a traditional approach or someone looking for modern convenience, there's a curing method that will work for you. The key is to understand the basics of each and follow the steps carefully.
Borax Curing Method (The Classic)
The borax cure is a long-standing favorite among many seasoned anglers, and for good reason. It’s effective, relatively simple, and results in a firm, durable egg that holds up well in moving water.
Here’s a common step-by-step approach:
- Prepare Your Workstation: Lay down newspaper or a large cutting board. Have your borax, non-iodized salt, and any desired colorants (like powdered salmon egg dye) ready. Wear gloves; the dye can stain, and it’s good practice for handling bait.
- Salt the Skeins: Lay your drained skeins flat. Sprinkle a generous amount of non-iodized salt over them, making sure to get it between the folds of the skein. Salt draws out moisture and begins the toughening process. Many anglers prefer a coarse pickling salt for this.
- Add Borax and Color: After salting, evenly sprinkle borax over the entire skein. Borax is a natural preservative and also helps to toughen the egg membrane, preventing them from bursting easily. If you're using a powdered dye, sprinkle it on now, distributing it evenly. Many anglers like a vibrant red or orange, which can be particularly effective for Oregon Salmon Fishing Techniques.
- Massage and Mix: Gently massage the salt, borax, and dye into the skeins. You want to ensure every egg surface is coated. Be firm but gentle; the goal is to work the cure in, not to burst the eggs.
- Layer and Rest: Place the massaged skeins into a non-reactive container (like a plastic food storage tub). You can stack them if you have multiple skeins. Cover the container and place it in the refrigerator. Over the next 12-24 hours, the salt and borax will draw out more moisture, creating a brine at the bottom of the container.
- Flip and Drain: After about 12 hours, flip the skeins in the liquid. After 24 hours (or up to 48 for very large, wet skeins), remove the skeins from the liquid, discarding the accumulated brine.
- Dry: This is a crucial step. Lay the cured skeins out on newspaper, paper towels, or a drying rack in a cool, well-ventilated area. Don't put them in direct sunlight or heat. Let them air dry for several hours, or even overnight, until they have a tacky, firm texture. They should no longer be wet or slimy. You can find borax at most grocery stores or readily available on platforms like Amazon.
Brine Curing Method (Wet Cure)
The brine cure is another highly effective method, often favored for creating a slightly softer, more plump egg that still holds together well. This method excels at saturating the eggs with scent and color.
- Prepare the Brine: In a large, non-reactive bowl or container, mix your brine ingredients. A common recipe involves non-iodized salt, sugar (which helps preserve moisture and adds a subtle sweetness fish often respond to), water, and liquid egg dyes. Many anglers also add concentrated scents like anise, krill, or salmon egg oil. The exact ratio can vary, but generally, you're looking for a strong salt solution.
- Submerge the Skeins: Place your cleaned, drained skeins into the prepared brine, ensuring they are fully submerged. You might need to use a plate or weight to keep them down.
- Refrigerate: Cover the container and place it in the refrigerator for 24-48 hours. The eggs will absorb the brine, taking on color and scent, and the salt will begin its preserving action.
- Rinse (Optional) and Drain: Some anglers give a quick, gentle rinse after brining to remove excess surface salt. Others skip this. Regardless, remove the skeins from the brine and allow them to drain thoroughly on paper towels or a drying rack.
- Drying Phase: Similar to the borax method, the drying phase is essential. Lay the brined and drained skeins out in a cool, well-ventilated area until they reach the desired tacky, firm consistency. This process can take several hours. The goal is to remove surface moisture, not to completely dry out the eggs. These eggs are fantastic for targeting trout in waters like those mentioned in our How to Catch Trout in Stocked Oregon Lakes guide.
Commercial Cure Kits (Convenience Option)
For those who prefer simplicity or are new to curing, commercial cure kits offer a fantastic, foolproof option. Brands like Pautzke, Pro-Cure, and others offer pre-mixed formulas that take the guesswork out of the equation.
- Read Instructions Carefully: The golden rule with any commercial kit is to follow the manufacturer's instructions precisely. Each kit has its own specific ratios and steps.
- Mix and Apply: Typically, these kits involve mixing a powdered cure with your eggs. Some require adding water to create a slurry, while others are dry applications. You'll often apply the cure directly to the skeins, ensuring even coverage.
- Soak/Marinate: The eggs are then allowed to soak or marinate in the cure for a specified period, usually in the refrigerator. This allows the preservatives, dyes, and scents to penetrate the eggs.
- Drying: Just like the other methods, a crucial drying period follows. Lay the eggs out to dry until they achieve the desired texture.
Commercial kits are a great way to get consistent results, especially if you're not confident in mixing your own ingredients. Many of these kits are widely available at local tackle shops or can be easily ordered from online retailers like Amazon. They often come in various colors and scents, giving you flexibility without the need for extensive measuring.
Drying, Storing, and Using Your Cured Eggs
You've put in the hard work to select, clean, and cure your salmon eggs. Now comes the final, crucial stage: properly drying them, storing them so they last, and finally, getting them on your hook and into the water. These steps are just as important as the curing itself for ensuring you have top-quality bait when you need it most.
The Critical Drying Phase
Once your eggs have been through the curing process – whether borax, brine, or a commercial kit – they'll be wet or moist with the curing solution. The drying phase isn't about dehydrating them entirely; it's about setting the cure, toughening the outer membrane, and achieving the perfect tacky, firm texture that makes them ideal for fishing. If they're too wet, they'll be mushy and fall off the hook. If they're too dry, they'll be hard and less appealing.
Here’s how to do it right:
- Absorb Initial Moisture: After removing the eggs from their cure, gently place them on several layers of clean paper towels or a drying screen. Pat them lightly to absorb any excess surface liquid.
- Air Drying: Arrange the skeins or egg clusters in a single layer on a drying screen or a fresh layer of newspaper in a cool, well-ventilated area. Avoid direct sunlight or any heat source, which can cook the eggs and ruin their texture. A fan can help circulate air, speeding up the process.
- Monitor Texture: This is where experience comes in, but generally, you're looking for the eggs to be tacky to the touch, not wet or slimy. They should feel firm but still have a bit of bounce. This process can take anywhere from a few hours to overnight, depending on humidity and how wet they were to begin with. You might need to flip them gently a few times to ensure even drying. Properly dried eggs will hold their shape, resist bursting, and cling to a hook or How to tie a spinner for salmon fishing rig much better.
Storage for Longevity
You've made a batch of perfect cured eggs, now you want them to last! Proper storage is key to preserving their freshness, scent, and texture.
- Short-Term Refrigeration: For eggs you plan to use within a few weeks, an airtight container in the refrigerator is sufficient. Glass jars or rigid plastic containers work best. Ensure they are sealed tightly to prevent other fridge odors from contaminating your bait and to keep the eggs from drying out further.
- Long-Term Freezing: If you’ve got a large batch or want to save eggs for months, freezing is your best bet.
- Vacuum Sealing: This is by far the superior method. Place portions of your cured and dried eggs into vacuum seal bags. Remove all the air and seal them. This prevents freezer burn and locks in freshness and scent.
- Freezer Bags: If you don't have a vacuum sealer, place portions in heavy-duty freezer bags. Press out as much air as possible before sealing. Double-bagging can add an extra layer of protection against freezer burn.
- Labeling: Always label your containers or bags with the date of curing. This helps you rotate your stock and ensures you're always using the freshest available bait.
- Thawing: When you're ready to use frozen eggs, simply transfer them to the refrigerator the day before your trip to allow them to thaw slowly. Avoid microwaving or rapid thawing, as this can degrade their texture.
Rigging and Fishing with Cured Eggs
Now that you have your perfectly cured salmon eggs, it's time to put them to good use! Cured eggs are incredibly versatile and can be used in various fishing techniques, especially for targeting salmon and steelhead in Oregon's diverse waterways.
- Egg Loops: For individual or small clusters of eggs, an egg loop knot on your leader is incredibly effective. This knot creates a small loop that snugs tightly around the eggs, holding them securely without piercing them directly, which can cause them to burst. This is a favorite method for drift fishing.
- Egg Mesh/Net Bags: For larger clusters, or if your eggs are a bit softer, an egg mesh bag (often called "roe netting") is a game-changer. You place a desired amount of eggs into a small square of the mesh, gather the corners, and tie it off tightly with elastic thread or a simple knot. This creates a durable bait sac that leaks scent slowly and stays on the hook incredibly well, even in strong currents. You can buy pre-cut mesh or a roll of netting at most tackle shops.
- Fishing Techniques:
- Drift Fishing: This is perhaps the most popular way to use cured eggs in rivers. A small amount of weight (pencil lead, slinky, or split shot) is rigged above your leader, allowing your egg presentation to "drift" naturally along the bottom, mimicking dislodged eggs. This is highly effective for steelhead and salmon in rivers like the Deschutes or Rogue. Check out our Drift Fishing Techniques for Oregon Rivers for more in-depth advice.
- Bobber and Jig/Egg: For slower moving water, deep holes, or when you want to suspend your bait at a specific depth, a bobber and jig or bobber and egg setup works wonders. Your cured egg cluster is fished under a float, keeping it off the bottom and in the strike zone. This is a classic method for spring Chinook. Our Bobber and Jig Technique for Oregon Salmon article has more details.
- Plunking: In higher, faster water, or when fishing from shore, plunking can be effective. A heavy weight anchors your line, and a bait presentation (often an egg cluster) is held stationary in the current, waiting for fish to move past and pick it up.
- Back-Trolling/Back-Drifting: From a boat, cured eggs can be back-trolled or back-drifted through prime holding water, especially for salmon. The scent trail attracts fish, and the natural drift of the bait is irresistible.
By mastering the art of curing your own salmon eggs, you're not just saving money; you're gaining an incredible tool in your angling arsenal. The freshness, customization, and pure satisfaction of using bait you've prepared yourself can genuinely enhance your fishing experience and lead to more successful days on the water. Just remember to always consult the current Oregon Fishing Regulations Explained before heading out!
Disclaimer
This article is for general informational purposes only and does not constitute professional advice. Laws, prices and regulations vary by location and change over time. Consult a qualified professional for guidance on your specific situation.