What is plunking for salmon
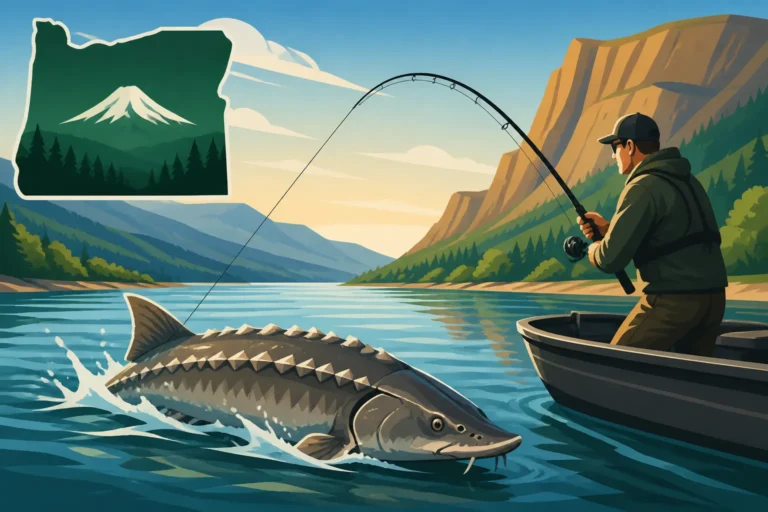
Oh, the age-old question that many a seasoned angler and curious newcomer alike ponder when they look out at a swirling, high-water river in Oregon: "What is plunking for salmon?" It's a fantastic, often incredibly effective, and sometimes delightfully lazy way to catch salmon, especially when the conditions are challenging, or you're simply looking to enjoy a peaceful day on the bank without constant casting. This guide will walk you through everything you need to know about this unique and productive technique, from understanding its core principles to rigging up like a pro and finding the best spots.
Understanding the Core Concept of Plunking for Salmon
When you hear "plunking," your mind might conjure images of something just… sitting there. And in a way, you wouldn't be wrong! But there's a real art and science to effectively "plunking" for salmon that has made it a go-to method for countless anglers across Oregon's magnificent rivers. It's not just about tossing a line in; it's about understanding how salmon move, feed, and react in certain conditions.
What is "Plunking" Anyway?
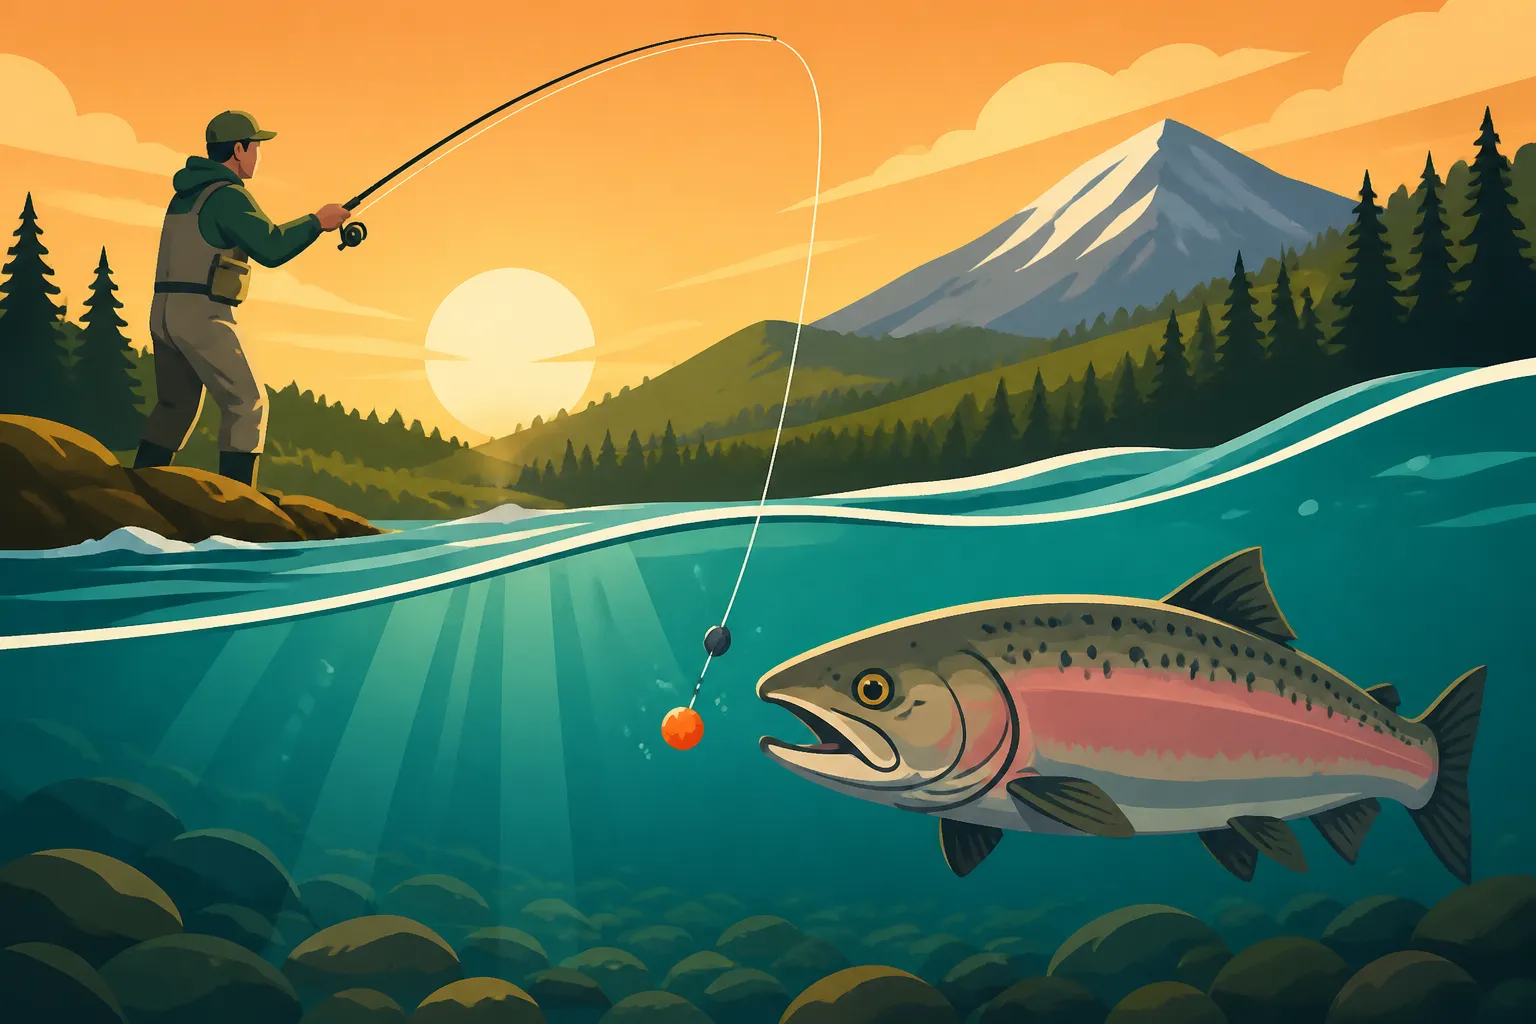
At its heart, plunking is a stationary, bottom-fishing technique designed to present bait or a lure to salmon migrating upstream. Unlike drift fishing or casting and retrieving, where you're actively moving your presentation through the water, plunking involves casting your rig out, letting it sink to the riverbed, and leaving it there, often for extended periods. The current then works its magic, imparting action to your lure or dispersing scent from your bait, creating an irresistible attraction for passing salmon.
Imagine a large, heavy weight securely holding your line in place on the river bottom. A leader, often quite long, extends from that weight, allowing your bait or lure to dance and flutter naturally in the current just above the bottom, right in the salmon's travel lane. It's a waiting game, yes, but one where the river does most of the work for you. This is why it's so popular for bank anglers who want to cover a lot of water with minimal effort, or for boat anglers anchoring up in a prime travel lane.
Why Plunking Works for Salmon in Oregon's Rivers
The effectiveness of plunking boils down to several key factors specific to salmon behavior and river dynamics, especially here in Oregon. Salmon, particularly Chinook and Coho, are driven by instinct to migrate upstream to spawn. They follow well-defined travel lanes, often hugging the bottom or edges of the main current to conserve energy.
Firstly, scent dispersion is huge. In turbulent or off-color water, a salmon's lateral line and sense of smell become even more crucial than sight. Plunking allows a static bait, like cured salmon eggs or a sardine-wrapped plug, to continuously release a plume of scent downstream, creating an olfactory billboard that guides salmon directly to your offering. Think of it like a beacon in murky waters.
Secondly, natural presentation in current. Even though your weight is stationary, your leader is long enough that the current gives your lure or bait a natural, lifelike action. A Spin-N-Glo, for instance, will spin enticingly. A Brad's Super Bait will wobble and pulsate. This movement mimics natural food sources or draws aggressive strikes from salmon that are often more concerned with their migration than with feeding.
Lastly, covering key travel lanes. Salmon often move in specific "lanes" that offer the path of least resistance or provide cover. Plunking allows you to target these lanes with precision, keeping your offering right where the fish are most likely to pass. When rivers are high and running strong, these travel lanes can be hard to reach with other methods, but a heavy plunking weight can hold its ground in even the swiftest currents.
When and Where Plunking Shines
Plunking really comes into its own under specific conditions that often deter other fishing methods. It's a technique for the patient, the strategic, and those who know how to read a river.
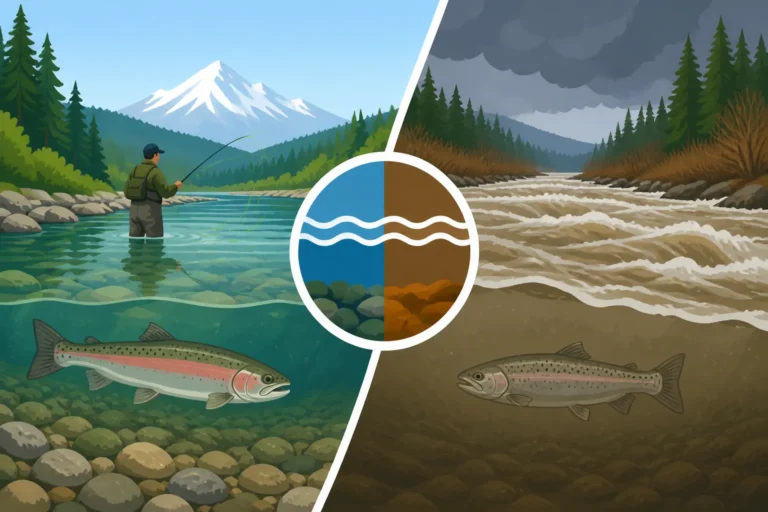
It's particularly effective during periods of high or off-color water. When rain swells the rivers, making them muddy and swift, salmon still need to move upstream. In these conditions, visibility is low, and salmon rely heavily on scent and their lateral line. A plunking rig, putting out a strong scent trail in a known travel lane, becomes incredibly productive. This is often the case during those classic fall Chinook runs on rivers like the Columbia River or the lower Willamette.
Plunking is also excellent for fishing from the bank, especially in large rivers. It eliminates the need for a boat and allows anglers to target spots that might be difficult to reach with standard casting or drifting techniques. Long stretches of the Columbia, the lower sections of the Sandy River, and the Clackamas River offer fantastic plunking opportunities from accessible shorelines, often near boat ramps or parks. You'll often see rows of rod holders hammered into the bank, each holding a rod patiently waiting for a bite.
Think about specific stretches of river known for heavy salmon migration. Confluences where a tributary meets a larger river often create natural holding or staging areas for salmon, and the varied currents can be perfect for plunking. Deeper holes, slow seams adjacent to fast currents, and the edges of main channels are all prime locations where salmon might pause or travel. Learning the specific Oregon Fishing Season Dates and Limits for the species you're targeting is crucial, as plunking is most effective during peak runs.
Essential Gear for a Successful Plunking Setup
To effectively "plunk" for salmon, you can't just grab any old rod and reel. This technique demands specific gear that can withstand powerful currents, handle heavy weights, and ultimately, subdue a hard-fighting salmon. Without the right tackle, you'll be spending more time re-rigging than fishing.
The Right Rod, Reel, and Line
Let's break down the foundation of your plunking arsenal.
Rods: You'll want a heavy-duty rod, usually in the 9 to 10.5-foot range, with a medium-heavy to heavy power and a moderate-fast action. The length helps with casting heavy weights and absorbing the shock of a powerful salmon strike in current. The robust backbone is essential for keeping a large salmon hooked and for handling the stress of constant current on your line and weight. Many anglers prefer fiberglass rods for their durability and forgiving action, though graphite composites are also popular. Look for rods rated for 15-40 pound line and capable of throwing weights from 2 to 10 ounces, sometimes even more depending on the river and current. Brands like Lamiglas or Shimano offer excellent options that stand up to the rigors of plunking.
Reels: A sturdy, baitcasting reel (levelwind preferred) or a large spinning reel is ideal. The key is a strong drag system and high line capacity. You need to be able to set the hook hard and fight a powerful fish that might strip a lot of line in heavy current. A reliable reel with smooth retrieve and robust gears, capable of holding at least 200-300 yards of 30-50 lb test line, is non-negotiable. For many, a good quality baitcasting reel from Ambassadeur or Daiwa is the workhorse of choice for its cranking power and control.
Line: This is not the place for ultralight finesse fishing. You'll want strong monofilament or braided line.
- Monofilament: Often 25-40 lb test. It offers good abrasion resistance against rocks and debris, has some stretch to absorb shock, and is relatively inexpensive.
- Braided Line: 50-80 lb test is common. Braid has zero stretch, offering incredible sensitivity to feel even the slightest tap, and superior strength-to-diameter ratio, allowing for longer casts with heavy weights. However, it requires a monofilament or fluorocarbon leader to provide some shock absorption and reduce visibility. If you're using braid, consider a top shot of mono to help with stretch at the hookset.
Remember to spool your reel tightly and evenly, no matter which line you choose. A poorly spooled reel will lead to tangles and lost fishing time.
Weights, Leaders, and Terminal Tackle
This is where plunking gets specific. Your terminal tackle is designed to get your offering down, hold it in place, and present it enticingly.
Weights: The crucial element that holds your rig in the current. Pyramid weights (often called "cannonballs" by anglers for their shape) or pyramid sinkers are the most common choice, ranging from 4 to 12 ounces, sometimes heavier in extreme currents. The shape helps them dig into the riverbed and resist rolling, which is essential for staying put. Attach your weight with a heavy-duty snap swivel or a sliding duolock snap, allowing for quick weight changes to match current conditions.
Leader Material: For your leader, 25-50 lb test monofilament or fluorocarbon is standard. Fluorocarbon is less visible underwater and offers excellent abrasion resistance. The length of your leader is critical and can vary from 3 to 6 feet, sometimes even longer, depending on the current speed and water depth. A longer leader allows your lure or bait to move more naturally. You want enough length for the bait to 'swim' but not so much that it fouls easily.
Scent Spreaders and Lures: The "business end" of your plunking rig.
- Scent Spreaders: These are a classic plunking component. They're typically a plastic or metal tube with a wire leader. You attach your main line to one end, your weight to a dropper loop, and your leader (with lure/bait) to the other end. The weight goes on a short dropper line (6-12 inches) that's weaker than your main line. This way, if your weight gets snagged, you only lose the weight, not your entire rig. The spreader also helps keep your leader away from your main line, reducing tangles.
- Spin-N-Glos: These brightly colored, buoyant plastic spinners are incredibly popular. They come in various sizes and colors, and the river current makes them spin and flutter, attracting salmon. You often rig them in front of bait.
- Brad's Super Baits / Wiggle Warts / Kwikfish: These are diving plugs that can be "wrapped" with bait (often sardines or herring) to add scent. The plug's action, combined with the scent, is a deadly combination. The river current makes these plugs dive and wobble, mimicking an injured baitfish.
- Hooks: Generally, a single, strong, sharp hook (e.g., a 3/0 to 5/0 octopus hook) is used. Some anglers might use a tandem hook setup, especially with eggs. The specific Oregon Fishing Regulations Explained will detail hook requirements, like barbless hooks often being mandatory for salmon and steelhead. You can find a good selection of these items on platforms like Amazon if your local tackle shop is out.
Bait and Scent for Attracting Salmon
When plunking, scent is your secret weapon. Salmon are primarily responding to scent and vibrations when visibility is low or they're in travel mode.
Cured Salmon Eggs: Without a doubt, cured salmon eggs are one of the most effective baits for salmon. They offer a potent scent and natural appeal. You can buy them pre-cured or cure your own. Present them in an "egg loop" knot or a small netting bag (spawn sac) to keep them secure on the hook. The key is fresh, high-quality eggs with a strong, attractive scent.
Sardine or Herring Wraps: Many anglers wrap cut pieces of sardine or herring onto their diving plugs (like Kwikfish or Super Baits). The natural oils and scent released from these oily fish are incredibly attractive to salmon. The plug provides the action, and the wrap provides the irresistible scent. It's a fantastic combination for getting those aggressive strikes.
Shrimp: Large prawns or coon shrimp can also be effective baits, particularly when targeting Coho salmon. They offer a strong scent and a texture salmon can't resist.
Scent Applications: Even if you're using a lure that isn't wrapped, applying a liquid or gel scent can significantly boost its effectiveness. Scents like Pautzke's Krill, Pro-Cure (in various salmon-attracting formulas), or Mike's Lures are popular choices. Reapply frequently, especially after a few casts or if you've been sitting for a while, to ensure a strong scent trail.
Choosing the right bait often depends on the river, the specific run, and local preferences, so don't be afraid to ask around at local tackle shops in towns like Astoria or Grants Pass for what's currently working.
Step-by-Step Guide to Plunking for Salmon in Oregon
Now that you've got your gear sorted, let's get down to the nitty-gritty of actually putting a plunking rig into action. It's more than just casting; it's about strategic placement, proper rigging, and patient observation.
Choosing Your Plunking Spot
Selecting the right location is paramount to plunking success. Remember, salmon follow specific travel lanes, and your goal is to intercept them.
- Confluences: Where two rivers meet, such as the Willamette River joining the Columbia, creates natural funnels and current breaks. Salmon will often pause or stack up in these areas, making them prime plunking spots.
- Eddies and Current Breaks: Look for areas where the main current slows down or creates an eddy. Salmon often travel along the edges of these current breaks to rest or conserve energy. A seam where fast water meets slow water is always a hot spot.
- Deep Holes and Channels: Use a depth finder if you're in a boat, or pay attention to the river's contours if bank fishing. Salmon will often hold or travel in the deeper parts of the river, especially in brighter conditions.
- Access Points: For bank anglers, popular plunking spots are often those with easy access, like boat ramps, designated fishing areas, or public parks along major rivers. For instance, the lower Sandy River has numerous accessible plunking spots. Be mindful of fellow anglers and their space.
When assessing a spot, consider the flow of the river. You want enough current to activate your lure and disperse scent, but not so much that your weight won't hold. A good plunking spot is where you can hold bottom with a reasonable weight and know salmon are passing through.
Rigging Up Your Plunking Setup
Here's a common plunking rig, often called a "three-way" or "spreader" rig, step-by-step:
- Main Line: Start with your main line (braid or mono) coming off your reel.
- Swivel: Tie a strong barrel swivel or a three-way swivel to the end of your main line. If using a three-way swivel, this is where it gets its name!
- Weight Dropper: From one eye of the swivel (or the bottom eye of the three-way), tie a short leader (6-12 inches) of slightly lighter test monofilament (e.g., 20 lb test if your main line is 40 lb). This is your dropper for the weight.
- Attach Weight: To the end of this dropper, attach your pyramid or cannonball weight using a heavy-duty snap swivel. The lighter leader here is a deliberate choice: if your weight snags on the bottom, the dropper line will break before your main line, saving the rest of your rig.
- Lure Leader: From another eye of your main swivel (or the side eye of the three-way), tie a longer leader (3-6 feet) of your chosen leader material (25-50 lb mono or fluorocarbon).
- Attach Lure/Bait: To the end of this long leader, tie your chosen lure (Spin-N-Glo, Brad's Super Bait, Kwikfish) or a hook for your cured eggs/shrimp. If using a plug that gets wrapped, prepare your bait wrap beforehand.
- Add Scent (if applicable): Apply your chosen scent to your bait or lure generously. Reapply as needed.
This "three-way" setup keeps your weight firmly on the bottom while allowing your bait or lure to drift naturally above it, right in the strike zone. You can also use pre-made plunking spreaders, which simplify the process considerably.
Casting and Setting Your Rods
Casting a heavy plunking rig takes a bit of practice. The momentum of a heavy weight can be dangerous if not handled correctly.
- Check Your Surroundings: Always look behind you to ensure no one is in your back cast path.
- Load the Rod: Use a smooth, controlled overhead cast. Let the weight of the sinker load the rod, then release the line in a sweeping motion. Don't try to whip it; let the rod do the work.
- Feel for the Bottom: As your rig flies, be ready to feather the spool (on a baitcaster) or close the bail (on a spinning reel) just before it hits the water to prevent tangles. Once it splashes down, let it sink until you feel the weight hit the bottom. You'll feel a distinctive "thump."
- Set the Rod: Once your weight is on the bottom, reel in any slack line until there's a slight bend in your rod tip from the current. You want enough tension to hold the bottom and detect a bite, but not so much that your weight is constantly dragging or lifting. Place your rod securely in a sturdy rod holder. Many plunkers use specialized bank holders that spike into the ground. If you're using multiple rods (check Oregon Fishing Regulations Explained for legal rod limits), spread them out in a fan pattern to cover different parts of the travel lane.
Now, the waiting game begins! This is where patience truly comes into play. Sit back, relax, and keep a watchful eye on your rod tips.
Reading the Bite and Fighting a Salmon
A salmon bite on a plunking rig can sometimes be subtle, or it can be a jarring, rod-bending strike that nearly pulls your rod out of its holder!
- Subtle Tugs: Often, especially in strong current, a salmon might just "lean" on your bait. You'll see the rod tip dip slightly and then slowly straighten, or give a series of rhythmic taps. This might be a fish mouthing the bait or simply bumping it as it swims past.
- Aggressive Strikes: The most exciting bite is when a salmon grabs it with conviction. Your rod tip will violently lunge down, often staying bent. This is usually your cue!
Setting the Hook: When you get a definitive bite, grab your rod, point the tip towards the fish, reel up any slack, and then give a firm, sweeping hookset. Don't be shy; you need to drive that hook into the salmon's jaw, especially with large hooks and strong currents.
Fighting the Fish: Once hooked, a salmon in heavy current is a powerful adversary.
- Keep Tension: Maintain constant pressure on the fish. Never give slack, or the hook can come out.
- Let the Drag Work: This is where your strong drag system comes into play. Let the fish run if it wants to, but keep the drag set firm enough to tire it out. Do not over-tighten the drag, or you risk breaking your line or pulling the hook.
- Use the Current: Try to move with the fish if possible, or use the current to your advantage. If a fish is running downstream, try to get below it to gain better leverage.
- Netting: When the fish is tired and close, use a large, strong landing net. Don't try to scoop a green (energetic) fish; wait until it's subdued, then scoop it headfirst.
Remember your Oregon Combined Angling Tag Guide and ensure you have the necessary tags for salmon, and always adhere to Oregon Daily Bag Limits Explained.
Tips and Tricks for Maximizing Your Plunking Success
Plunking, while seemingly simple, has many nuances that experienced anglers learn over time. A few adjustments and understandings can dramatically increase your chances of success.
Understanding Water Conditions and Salmon Behavior
Being a successful plunker isn't just about the rig; it's about being a keen observer of the river and its inhabitants.
- High, Murky Water: As mentioned, this is prime plunking time. The reduced visibility forces salmon to rely more on scent and vibrations. This is when strong, oily baits and scent-infused lures truly shine. Don't be afraid to use brighter, more contrasting colors for your Spin-N-Glos or plugs, as they can create a better silhouette in low light.
- Clearer, Lower Water: In very clear, low water, plunking can still work, but salmon might be more skittish. You might need to scale down your leader size slightly, use more natural bait colors, and consider longer leaders to present your offering more subtly. Focus on deeper, shadier spots where fish might feel more secure.
- Water Temperature: Salmon are sensitive to water temperature. Optimal temperatures vary by species, but generally, they prefer cooler water for migration. During warmer periods, they might hold in deeper, cooler pockets of the river or become more active during cooler parts of the day (early morning, late evening).
- Tides: For rivers influenced by tides, like the lower Columbia River or bays along the Oregon Coast, understanding the tide cycle is crucial. Incoming tides often push fresh fish upstream, while outgoing tides can concentrate fish in specific holding areas or make them more active as they continue their journey. Plunking often excels on the last half of an incoming tide and the first half of an outgoing tide.
Adapting Your Setup for Different Scenarios
The "perfect" plunking rig is rarely static; it evolves with the conditions.
- Weight Adjustments: This is perhaps the most frequent adjustment you'll make. If your weight is rolling too much, increase the weight. If it's digging in too hard and collecting debris, or if the current isn't as strong as you thought, you might decrease it. Always carry a selection of weights in different sizes.
- Leader Length: A general rule of thumb is a longer leader in slower currents for a more natural presentation, and a slightly shorter leader in faster currents to prevent excessive tangling or fouling. Experimenting with leader length can make a big difference.
- Bait Changes: If one bait isn't producing, don't be afraid to switch it up! Try different colors of Spin-N-Glos, different scents, or switch from eggs to a wrapped plug. Sometimes a minor change is all it takes to trigger a bite. Have several rigs pre-tied with different options for quick changes.
- Rod Placement: If you're using multiple rods, try placing them at slightly different angles or distances. One rod might target the main travel lane, another the edge of an eddy, and another a deeper hole. This "fan casting" approach helps you locate where the fish are running on a particular day.
Safety and Etiquette on the River
Being a responsible angler is just as important as catching fish.
- Respect Other Anglers: Plunking spots, especially on popular rivers like the Columbia, can get crowded. Give other anglers ample space. Don't cast over someone else's line. A general rule of thumb is to allow at least 25-50 feet between anglers, or more if possible.
- Know the Regulations: Always, always check the current Oregon Fishing Regulations Explained before heading out. Regulations for salmon can change frequently, sometimes even mid-season, due to run size updates or conservation efforts. Pay close attention to bag limits, size restrictions, specific gear restrictions (e.g., barbless hooks only), and open/closed areas. Ignorance is not an excuse for a violation.
- Responsible Handling: If you're practicing catch and release, handle fish gently and release them quickly. Minimize their time out of the water. For fish you're keeping, dispatch them humanely and bleed them immediately for better meat quality.
- Leave No Trace: Pack out everything you pack in, and perhaps even a little extra. Discarded line, bait containers, and trash are detrimental to the environment and other anglers' experiences.
Remember that a valid Oregon Fishing License Guide is essential for all anglers over the age of 12, along with any necessary endorsements like the What is the Columbia River Basin Endorsement for Oregon anglers if you're fishing on that river.
Common Plunking Locations and Species
Oregon offers a plethora of fantastic plunking opportunities, particularly for anadromous fish like salmon and steelhead that make their way up our storied rivers from the Pacific Ocean. While specific runs and regulations change, some areas are consistently productive. Knowing which Oregon Salmon Species Guide you're targeting can help you refine your approach.
The Mighty Columbia River
The Columbia River, forming much of Oregon's northern border, is arguably the most famous plunking destination in the state, especially for fall Chinook salmon. Its sheer size and strong currents make it ideal for this stationary technique.
- Species: Primarily targets Fall Chinook Salmon, often called "Upriver Brights" or "Tules," depending on the run. You might also encounter Coho (Silver) Salmon and, occasionally, Sturgeon (though specific seasons and tags apply for retention).
- Key Locations:
- Buoy 10 area (Astoria): While more commonly known for trolling, plunking can be effective here, particularly on outgoing tides at specific spots.
- Near the mouths of tributaries: The areas where the Cowlitz, Lewis, Kalama, Sandy, or Willamette Rivers feed into the Columbia create natural funnel points and current breaks that salmon utilize.
- Popular bank access spots: Places like Rooster Rock State Park, the Longview/Rainier area, and various public access points further upstream offer prime bank plunking.
- When to Plunk: The peak of the Fall Chinook run, typically from late August through September and into October, is prime time. This is when huge numbers of salmon enter the river, and often, water conditions are favorable (e.g., higher flows, occasional murkiness). Learning How to Fish for Fall Chinook on the Columbia is almost synonymous with mastering plunking here.
The Willamette River
Flowing right through the heart of Oregon, the Willamette River, especially its lower reaches near Portland, also offers excellent plunking opportunities.
- Species: Spring Chinook Salmon and Fall Chinook Salmon are the primary targets. Coho can also be present.
- Key Locations: The mainstem Willamette, particularly below Willamette Falls at Oregon City and through the Portland metro area, has numerous spots.
- Sportcraft Landing (Oregon City): A very popular spot, especially during the spring Chinook run.
- Mouth of the Clackamas River: Another confluence zone where fish hold and travel.
- Along the Portland waterfront: Believe it or not, dedicated urban anglers find success here.
- When to Plunk: For Spring Chinook, late April through June is key. Fall Chinook runs typically pick up in late August and continue into October. Plunking can be a highly effective method when river flows are high and the water is off-color, which is common during these seasons.
The Sandy River
East of Portland, the Sandy River is a beautiful, wild river that sees significant salmon and steelhead runs. Its dynamic flows make plunking a valuable technique, particularly after rains.
- Species: Fall Chinook Salmon and Coho Salmon. Winter steelhead are also a target, and plunking can be adapted for them.
- Key Locations: Numerous public access points along Highway 26.
- Dabney State Recreation Area: A popular bank fishing spot with good current seams.
- Lewis & Clark State Recreation Site: Another well-known access point.
- Throughout its lower and middle sections: Look for deeper holes and slower seams adjacent to fast currents.
- When to Plunk: Fall Chinook and Coho runs typically peak from September through November. Plunking is very effective here, especially when rain causes the river to swell and become turbid, making visibility low for the fish.
The Clackamas River
Another tributary of the Willamette, the Clackamas River, offers excellent plunking prospects, particularly in its lower sections before it meets the Willamette.
- Species: Fall Chinook Salmon, Coho Salmon, and Winter Steelhead.
- Key Locations:
- Mouth of the Clackamas (Carver area): Where it meets the Willamette is a high-traffic area for migrating fish.
- Barton Park: Offers good bank access and current breaks.
- McIver Park: Further upstream, but can offer plunking opportunities in certain sections.
- When to Plunk: Similar to the Sandy, fall Chinook and Coho runs are best from September to November. Winter steelhead can be plunked for in the colder months, generally December through March.
Remember, local knowledge is golden. Always check with local bait and tackle shops, like Fisherman's Marine & Outdoor, or online forums for the most current conditions and productive spots before you head out. They often have the most up-to-date information on what's biting and where.
Plunking for salmon in Oregon is a time-honored technique that, when done correctly, can be incredibly rewarding. It teaches patience, the importance of understanding river dynamics, and the simple joy of sitting back and waiting for that exhilarating strike. So, next time the rivers are high and churning, consider rigging up a plunking setup. You might just find yourself connected to a chrome bright salmon, realizing why this method has such a dedicated following.
Disclaimer
Fishing conditions and regulations in Oregon are subject to change without notice. Always check the latest Oregon Department of Fish and Wildlife (ODFW) regulations before you head out on your fishing adventure. This guide is for informational purposes only and does not constitute legal advice.